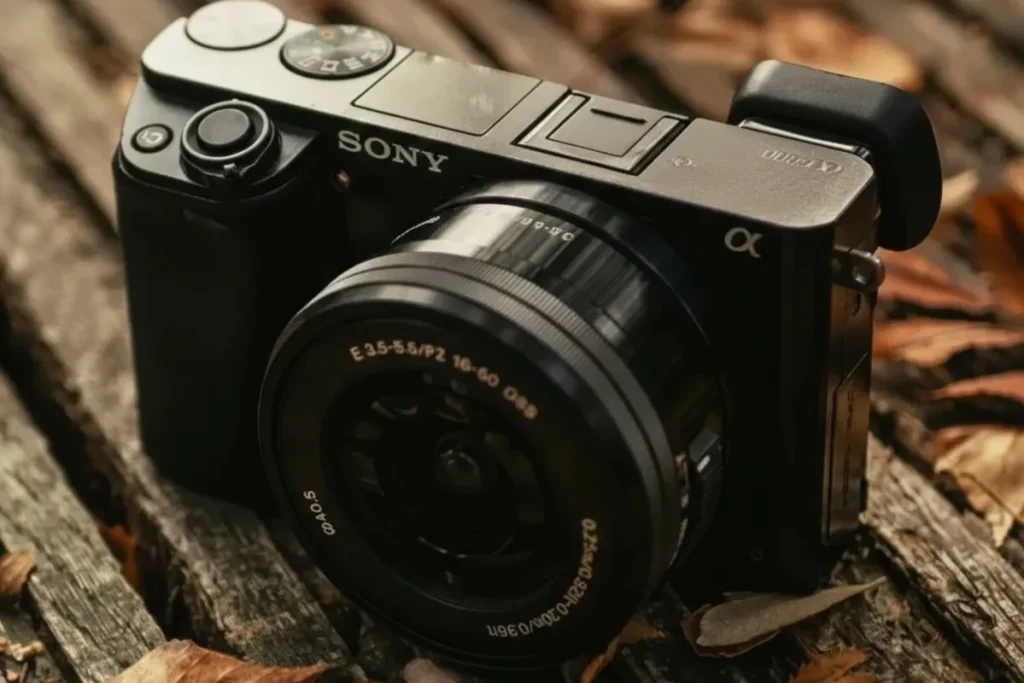
If you’ve ever wondered how to use a mirrorless camera, you’re in the right place on your photography journey. Mirrorless cameras have revolutionized photography with their compact size and advanced features. Understanding the ins and outs of these cameras can elevate your photography game to new heights.
Whether you’re a beginner looking to get into the world of mirrorless cameras or a seasoned photographer seeking tips and tricks, this guide will walk you through everything you need to know. From mastering basic functions to exploring creative techniques, we’ve got you covered on your photography journey. Get ready to unlock the full potential of your mirrorless camera and capture stunning shots like never before.
Key Takeaways
- Get to know your mirrorless camera: Understanding the features and capabilities of your camera is essential for maximizing its potential.
- Proper setup is key: Setting up your camera correctly ensures you capture high-quality images and videos.
- Master your grip: Holding your camera properly can significantly impact the stability of your shots.
- Learn the basics: Exploring photography fundamentals like composition and lighting can take your photos to the next level.
- Experiment with advanced techniques: Delve into advanced shooting techniques to unleash your creativity and expand your photographic skills.
- Utilize on-screen displays: Take advantage of the on-screen display insights to adjust settings and enhance your shooting experience.
Understanding Mirrorless Cameras
Basic Functions
When using a mirrorless camera, powering on and off is simple – just locate the power button and press it. To navigate through menu settings efficiently, use the directional pad or touchscreen. Adjust exposure by changing the aperture, shutter speed, or ISO settings.
To set the white balance, access the menu and select the appropriate preset or manually adjust it. These basic functions are crucial for capturing well-exposed and balanced shots.
Key Features
Understanding sensor size is vital as it affects image quality. Larger sensors generally produce better images with less noise. The resolution determines the amount of detail in your photos – higher resolution means sharper images.
Electronic viewfinders (EVFs) offer a digital preview of your shot before you take it. This feature helps you visualize how your final image will look, making it easier to compose shots accurately.
Wireless connectivity allows you to transfer photos wirelessly from your camera to other devices like smartphones or computers. This feature streamlines the process of sharing and editing your images.
Camera Controls
Mode Dial
The mode dial lets you switch between different shooting modes effortlessly. Each mode serves a specific purpose – for instance, manual mode gives you full control over settings like aperture, shutter speed, and ISO.
Customize settings based on the selected mode to suit your shooting style. For example, in aperture priority mode, adjust the aperture setting while letting the camera choose the appropriate shutter speed for optimal exposure.
Control Wheel
The control wheel allows you to fine-tune settings like aperture and shutter speed with precision. Customize this wheel to quickly access functions you use frequently, enhancing your shooting experience.
By assigning functions such as exposure compensation or ISO adjustment to the control wheel, you can streamline your workflow and make adjustments swiftly while shooting.
ISO Button
Adjusting ISO settings quickly is essential when dealing with varying lighting conditions. Higher ISO values are useful in low-light situations but may introduce more noise into your images.
Understanding how ISO impacts image quality helps you make informed decisions when setting up your shots. Utilize the auto ISO function to let the camera adjust sensitivity automatically based on lighting conditions.
Setting Up Your Camera
Adjusting Settings
Aperture
When it comes to aperture, it’s crucial to grasp its impact on depth of field. By adjusting the aperture, you control how much of your image is in focus. Experiment with different aperture settings to unleash creative control over your photos.
Understanding how aperture affects exposure is key. A wider aperture lets in more light, suitable for low-light conditions, while a smaller aperture reduces light and increases depth of field. This balance impacts your image quality significantly.
Shutter Speed
Mastering shutter speed allows you to capture motion effectively. Adjusting this setting helps freeze fast-moving subjects or create motion blur for artistic shots. Long exposure techniques can produce stunning effects like silky waterfalls or star trails.
Balancing shutter speed with other exposure settings is vital for well-exposed images. Too slow a speed may result in blurry photos, while too fast might darken your image. Find the sweet spot that suits your desired outcome.
ISO
Managing ISO settings controls how sensitive your camera is to light. Higher ISO values brighten images but may introduce noise. Avoid excessively high ISO levels to maintain optimal image quality unless intentionally seeking a grainy effect.
Get creative with ISO by using it strategically for different effects. For instance, raising the ISO in dim lighting situations can help you achieve well-exposed shots without compromising sharpness. Experimentation is key here.
Focus Modes
Selecting the right focus mode enhances your ability to capture sharp images in various scenarios. Single-point focus is ideal for still subjects, while zone focus covers broader areas and tracking focus follows moving subjects seamlessly.
Manual focus provides precise control over what elements are sharp in your shot. In situations where autofocus struggles, such as low contrast scenes or macro photography, manual focus empowers you to nail the focus exactly where you want it.
Metering Modes
Exploring different metering modes aids in accurate exposure calculation for your photos. Each mode evaluates light differently within a scene, influencing how your camera sets exposure levels automatically based on its readings.
Understanding metering modes enables you to make informed decisions when capturing challenging lighting situations. Utilize exposure compensation alongside metering modes to fine-tune exposure levels according to your creative vision.
Holding Your Camera
Proper Grip
When holding the camera, make sure to grip it securely to avoid any accidental drops. Maintaining a comfortable grip is crucial for long shooting sessions. Position your hands correctly to access controls easily.
A comfortable grip helps in reducing hand fatigue during extended photo or video sessions. Ensure that your fingers are wrapped around the camera body securely. This stability is essential for capturing clear and sharp images.
Placing your hands properly on the camera allows you to reach all the necessary buttons and dials without straining. By having a good grip on the camera, you can make quick adjustments to settings while shooting, enhancing your overall photography experience.
Stabilizing Techniques
Implementing stabilizing techniques such as bracing against a solid surface can significantly improve the sharpness of your photos. Tripods are excellent tools for keeping your camera steady, especially in low-light conditions.
Utilize the electronic viewfinder or LCD screen to ensure proper framing and composition before capturing a picture. These features help you visualize how the final image will look, leading to better results in your photography.
Practice controlling your breathing while taking photos to minimize camera shake. By inhaling deeply and exhaling slowly before pressing the shutter button, you can achieve sharper images with less blur. Incorporating these techniques enhances the quality of your photographs.
Exploring Photography Basics
Composition Rules
When composing your shots, remember the rule of thirds. Place your subject off-center for a more visually appealing and balanced composition. By aligning key elements along these gridlines, you create a harmonious image.
Experiment with leading lines to draw the viewer’s eye into the photo. Roads, fences, or even shadows can act as leading lines, guiding attention towards the main subject. This technique adds depth and interest to your compositions.
Framing techniques involve using elements within the scene to frame your subject. Overlapping branches, windows, or doorways can create a natural frame, adding layers and context to your photos. Explore different framing options for diverse and engaging shots.
Negative space is just as crucial as the main subject in a composition. It provides breathing room for the eyes and enhances the overall impact of your image. Embrace empty spaces around your subject to create a sense of balance and visual interest.
Lighting Techniques
When shooting portraits, leverage natural light for soft and flattering illumination. Position your subject near a window or shoot during golden hour for warm, gentle light that enhances skin tones naturally. Avoid harsh overhead sunlight for more pleasing results.
For creative effects and control over lighting, consider using artificial sources like strobes or continuous lights. Experiment with different angles and intensities to sculpt light and shadow in your images. Artificial lighting offers endless possibilities for artistic expression.
To add drama and depth to your photos, try backlighting techniques. Positioning your light source behind the subject creates silhouettes or highlights edges, adding visual interest. Backlighting can transform an ordinary scene into a dynamic and captivating image.
Depth of Field
Aperture settings on your camera play a significant role in determining depth of field in your photos. A wide aperture (low f-stop) creates a shallow depth of field, ideal for portraits with creamy bokeh backgrounds. In contrast, a narrow aperture (high f-stop) yields deep depth of field suitable for landscapes with sharp details throughout.
Experiment with different apertures to achieve varying effects on depth of field. Play around with focusing on different planes within the scene to see how sharpness changes across the image. Understanding aperture’s impact allows you to control what remains in focus in your photographs.
For intricate macro photography requiring extended depth of field, consider focus stacking with a camera. This technique involves merging multiple images taken at various focus points into one final photo with exceptional sharpness throughout. Focus stacking ensures every detail in close-up shots is tack-sharp.
Advanced Shooting Techniques
Creative Tips
When shooting with a mirrorless camera, think outside the box to capture unique perspectives. Experiment with unconventional angles and compositions to add an interesting flair to your photos. By doing so, you can create visually striking images that stand out.
To elevate your photography skills, try incorporating storytelling elements and camera into your shots. Instead of just capturing a scene with your camera, aim to tell a story through your photographs. Consider the emotions, narratives, and messages you want to convey through your images. This approach adds depth and meaning to your photography.
Another creative tip is to play around with different shooting modes on your mirrorless camera. Explore various settings such as aperture priority, shutter priority, or manual mode to have more control over your shots. Each mode offers unique advantages that can enhance the quality of your photographs.
Capturing Videos
When it comes to capturing videos with a mirrorless camera, take advantage of its video recording capabilities. Mirrorless cameras are known for their excellent video quality, making them ideal for videography projects. Experiment with different settings and features to achieve the desired visual effects in your videos.
Understand the importance of frame rates and resolutions in video production. Adjusting these settings can significantly impact the overall look and feel of your videos. Higher frame rates result in smoother motion, while higher resolutions offer better clarity and detail in your footage.
Make use of the video stabilization features available on most mirrorless cameras for smooth footage. Whether you’re shooting handheld or moving shots, stabilization technology helps reduce shaky footage and ensures professional-looking results. This feature is particularly useful when filming action sequences or vlogs on the go.
On-Screen Display Insights
Interpreting Information
When reading histograms, you can assess the exposure levels of your photos, ensuring they are neither underexposed nor overexposed. Look for a balanced distribution across the graph.
To understand the camera settings displayed on the screen, pay attention to details like aperture, shutter speed, and ISO. These settings directly impact the quality and style of your photographs.
Analyzing metadata provides valuable insights into your shooting techniques. Details such as focal length, exposure time, and aperture size help you refine your photography skills over time.
Using the Display Effectively
Customize display settings according to your preferences for better visibility. Adjust brightness, gridlines, and overlays to suit different shooting conditions.
Utilize the electronic viewfinder on your camera to achieve precise framing in your shots. This feature allows you to see exactly what the camera lens sees, aiding in composition and focus accuracy.
Check focus and exposure information directly on the camera display to ensure optimal image quality. Utilize tools like focus peaking and highlight alerts to enhance the sharpness and exposure of your photos.
Enhancing Your Skills
Practice Regularly
Consistency is key when it comes to improving your photography skills. Engage in regular practice sessions to hone your craft. Experiment with various settings and techniques to broaden your skill set. By doing so, you can discover new styles and approaches that work best for you.
Reviewing and analyzing your photos is crucial in tracking your progress. Take the time to evaluate each shot critically. Identify areas of improvement and celebrate your successes. This practice not only helps you grow but also boosts your confidence as a photographer.
Photography Workshops
Participating in workshops is a fantastic way to learn from experienced photographers. These sessions offer valuable insights and tips that can elevate your photography game. Surrounding yourself with like-minded individuals can be inspiring and motivate you to push your boundaries further.
Networking with fellow photography enthusiasts during workshops can open doors to new opportunities and collaborations. Share ideas, seek feedback, and build connections within the photography community. The hands-on experience gained through workshops provides practical knowledge that textbooks cannot match.
Attending workshops not only enhances your technical skills but also nurtures your creativity. Professionals often provide constructive feedback that helps you refine your techniques and develop a unique style. Embrace these learning opportunities to grow as a photographer.
Caring for Your Camera
Cleaning Tips
When it comes to properly cleaning your camera, ensure you gently remove dust and dirt from the body. Use a soft brush or blower to prevent scratches.
To maintain optimal performance, clean your lenses regularly. Avoid using harsh chemicals and opt for lens cleaning solutions. Wipe gently in circular motions.
Protect your camera from dust and debris by keeping it covered when not in use. Store it in a clean, dry place to prevent buildup.
Protection Strategies
Invest in a quality camera bag to safely transport your gear. Look for padded compartments to prevent impact damage during travel, especially for your camera.
When not shooting, always keep lens caps on to protect against scratches and dust. Consider using filters for added protection against accidental bumps.
Extreme weather conditions can harm your camera. Avoid exposing it to excessive heat or cold to prevent issues like condensation forming inside the lens.
Traveling with Your Camera
Packing Tips
When traveling with your mirrorless camera, organize your gear efficiently by using a padded camera bag. This helps protect your equipment from damage during transit. Separate your lenses and camera body to prevent scratches and ensure easy access.
Pack essential accessories like batteries and memory cards in a secure pouch within your camera bag. Carrying extra batteries is crucial for extended shooting sessions, especially when traveling to remote locations without easy access to power sources.
Consider the weight and size of your equipment when packing for trips. Opt for lightweight tripods or compact camera straps to minimize the burden on long walks or hikes during travel photography sessions.
Maintenance on the Go
When on the go, perform basic maintenance tasks like sensor cleaning on your camera to ensure optimal image quality. Use a portable cleaning kit that includes a blower brush and microfiber cloth for quick fixes while traveling.
Check your camera settings regularly to avoid missing out on capturing crucial moments during your travels. Ensure that your battery levels are adequate before embarking on any photography excursions to avoid disruptions in the middle of a shoot.
Regularly clean the lens elements with a lens pen or cloth to remove dust or smudges that may affect image sharpness. Keeping your gear well-maintained ensures that you can consistently produce high-quality photographs throughout your journeys.
Recommended Gear for Beginners
Camera Selections
When researching mirrorless cameras, compare various models to find one that suits your needs. Look at factors like sensor size, which impacts image quality, lens compatibility, and camera for future upgrades. Consider the ergonomics of the camera for comfortable handling during long shooting sessions.
To ensure you make an informed decision, test out different mirrorless cameras in-store. Alternatively, consider renting a few models to get a feel for their features and performance before committing to a purchase. This hands-on approach can help you choose the best camera for your photography style.
Exploring different mirrorless camera options allows you to find a model that aligns with your skill level and budget. By understanding the technical specifications and features of each camera, you can make a well-informed decision that enhances your photography experience.
Essential Accessories
Investing in quality lenses is crucial for expanding your creative possibilities. Choose lenses based on your preferred photography genres, such as wide-angle for landscapes or macro for close-up shots. Quality lenses can significantly impact the sharpness and clarity of your images.
To avoid running out of power during important shoots with the camera, it’s advisable to have extra batteries on hand. Having spare memory cards ensures you never miss capturing a moment due to storage limitations. These accessories are essential for uninterrupted shooting sessions.
Enhance your photography skills by exploring additional accessories like tripods, which provide stability for long exposures or self-portraits. Filters can add creative effects to your photos, while external flashes offer better lighting control in various shooting conditions. These accessories open up new possibilities for experimentation and creativity.
Closing Thoughts
You’ve now grasped the essentials of using a mirrorless camera, from setup to advanced techniques. Remember to care for your gear and explore new horizons with it. As you delve into photography, keep enhancing your skills and utilizing on-screen displays for better results. Packing your camera for travel will ensure you never miss a shot. Consider the recommended gear to elevate your photography game.
Embrace these insights and go capture unforgettable moments with confidence. Your journey with a mirrorless camera is just beginning. Keep practicing, experimenting, and pushing your boundaries to unleash your creativity fully.